POSTS
Tsuma, a Zuma clone in Typescript
- 14 minutes read - 2800 wordsIntro
Hey there! I wrote a clone of Zuma in TypeScript. I called it Tsuma - which is just “Typescript” + “Zuma” (yes, naming things is hard). You can play it right here in your browser:
This started as a “let me learn some TypeScript game dev” project, but quickly turned into a deep dive into ball physics, path generation, and the surprisingly tricky math behind making things “feel right.” If you’ve ever wondered what goes into making a marble-shooting puzzle game, or just want to understand why making balls bounce naturally is harder than it looks, you’re in the right place.
In this post, I’ll break down:
- The history of Zuma and its genre (spoiler: it wasn’t the first!)
- How the core game mechanics work
- The technical challenges I faced (and how I solved them)
- The math and physics behind the scenes (with minimal equations, I promise)
Whether you’re a developer curious about game mechanics or just want to peek behind the curtain of these addictive games, let’s dive in!
Zuma and Its History
Remember those late nights in the early 2000s, telling yourself “just one more level”? Zuma was definitely one of those games for me. It’s deceptively simple–shoot colored balls at a moving chain of other balls, match three or more of the same color, and try not to let the chain reach its destination. Think Snake meets match-3, but with an extra layer of challenge.
I first discovered Zuma via PopCap Games, which I was a big fan of. If PopCap sounds familiar, they’re also behind other addictive classics like Bookworm, Peggle, and Plants vs Zombies. (I may have lost a few productive hours to PvZ.)
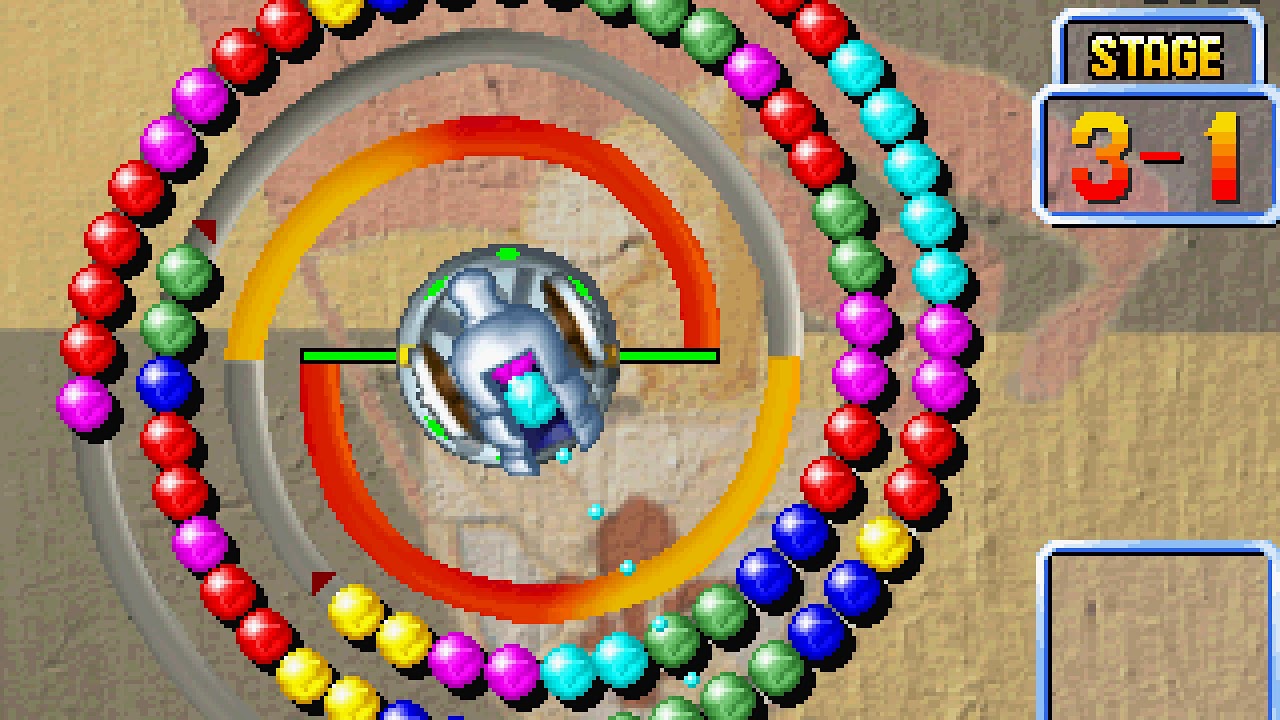
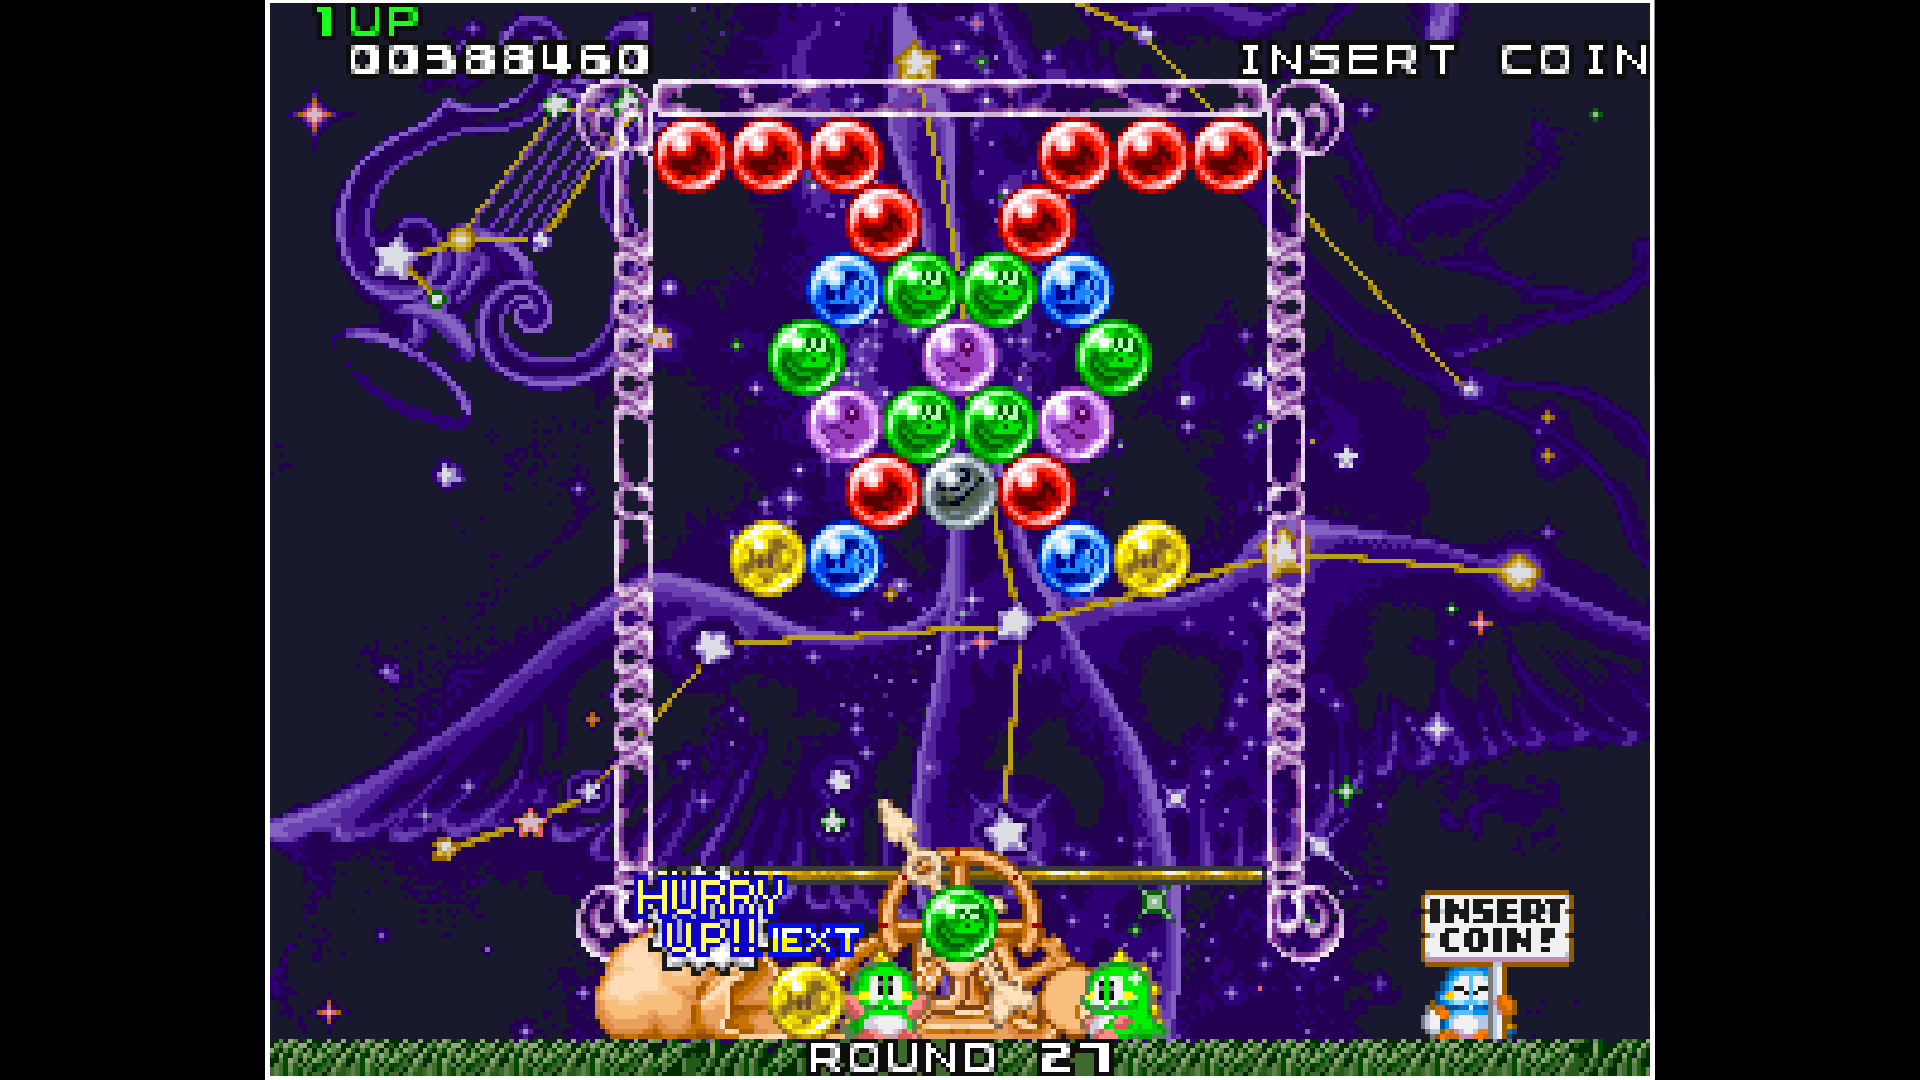
Here’s an interesting bit of gaming history: Zuma itself was inspired by an earlier game called Puzz Loop. Puzz Loop came out in 1998 and shares that same satisfying ball-matching mechanic with the classic Puzzle Bobble.
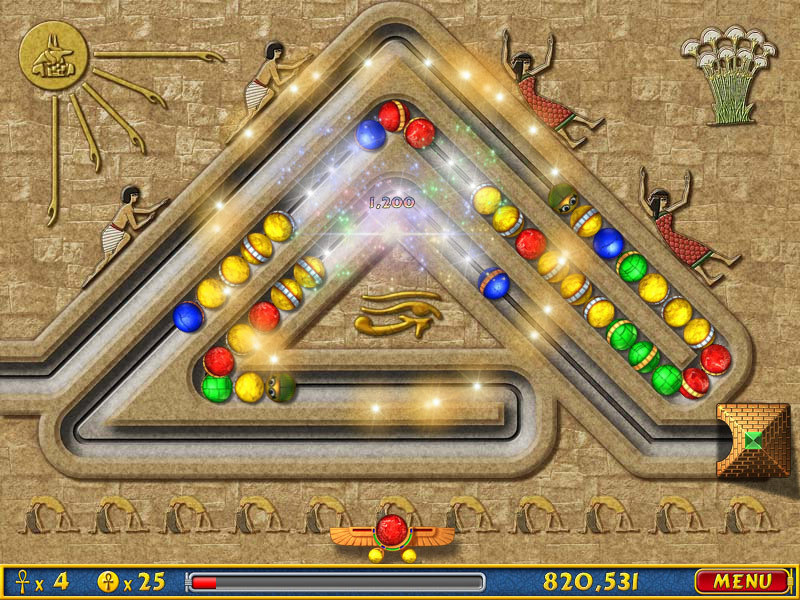
The Zuma formula was so compelling that it inspired its own genre of games. Luxor arrived in 2005 with an Egyptian theme - instead of a stone frog spitting balls, you controlled a winged scarab. The twist? Your shooter moved horizontally along the bottom of the screen, which proved to be just as challenging as Zuma’s rotating frog.
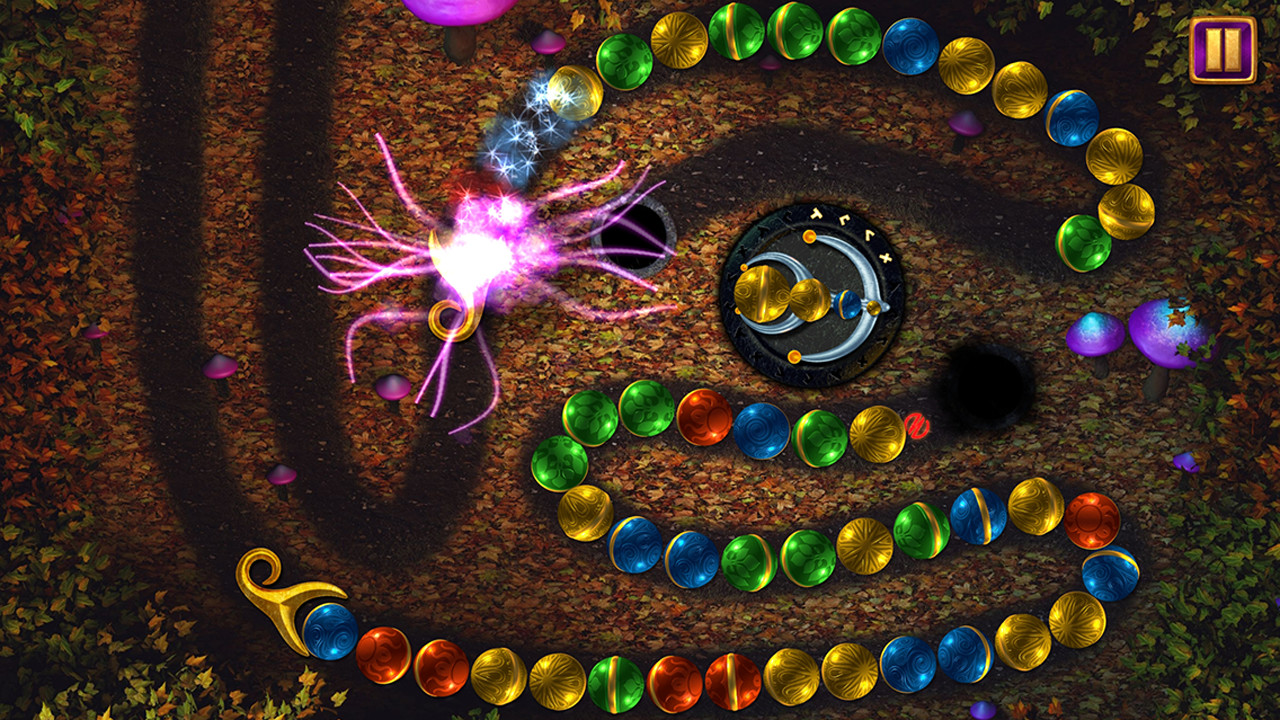
Then Sparkle came along in 2010 and added RPG elements to the mix. They enhanced the formula with power-up progression and magical abilities, adding another layer of strategy to the core matching mechanics.
Core Game Mechanics
The Physics of Fun
Remember playing with those Newton’s Cradle desk toys? The ones with the clicking metal balls that could waste hours of your workday? Our movement system is kind of like that, but way more chaotic and with significantly more questionable physics decisions made at 2 AM.

Movement System
The movement system works through coordinated updates where:
- The tail (foot) of the chain moves first along the waypoint path
- As the tail moves, it physically pushes any balls it collides with ahead of it (like a very colorful game of pool)
- This pushing force propagates through the entire chain like a wave:
- Each pushed ball pushes the next ball in front of it
- The chain ripples forward, maintaining proper spacing through collisions
- This creates a natural snake-like movement where the tail drives everything forward
- When any ball reaches its target waypoint, it advances to the next one in the path
Collision System
When you shoot a ball at the chain, the collision system:

- Detects the exact collision point between the free ball and chain (which is harder than it sounds, trust me)
- Uses vector math (scalar projection) to determine if the ball should insert before or after the collision point (cue flashbacks to linear algebra class)
- Pushes balls forward from the insertion point to maintain proper spacing (like trying to make room on a crowded subway, but with more math)
Understanding the Scalar Projection
A key challenge in the collision system is deciding whether to insert a new ball before or after the ball it collides with. This is where scalar projection comes in, and yes, it’s as mathy as it sounds:
-
When a collision occurs, we have:
- The movement vector of the chained ball (where it’s heading along its waypoint path)
- The collision vector (from the chained ball to the point of collision)
-
We use scalar projection to determine the ball’s position relative to the chain’s movement:
- Project the collision vector onto the movement vector
- If the projection is positive, the collision happened “ahead” of the chained ball
- If the projection is negative, the collision happened “behind” the chained ball
This mathematical approach ensures balls are inserted in the correct position regardless of the angle of collision or the shape of the track. It’s like having a very precise traffic cop for your colored spheres.

The scalar projection is calculated as:
\[ projection = \frac{\vec{C} \cdot \vec{M}}{\vec{M} \cdot \vec{M}} \]Where:
- \( \vec{C} \) is the collision vector
- \( \vec{M} \) is the movement vector
- \( \cdot \) represents the dot product
- And I promise this is the only equation you’ll see in this post
Game Features
The Secret Sauce
This is where things get spicy. We’ve got matches that chain together like dominoes, balls that act like magnets (but only when they feel like it), and power-ups that can turn the tide faster than you can say “why did I shoot that there?”
Matching System
The basic matching mechanic follows these rules:
- When 3 or more balls of the same color connect in the chain, they are removed
- Removing balls can cause previously separated sections to connect
- This can trigger chain reactions of matches
Magnetic Behavior
The game features a unique “magnetic” behavior that adds strategic depth and occasional moments of “wait, what just happened?”:
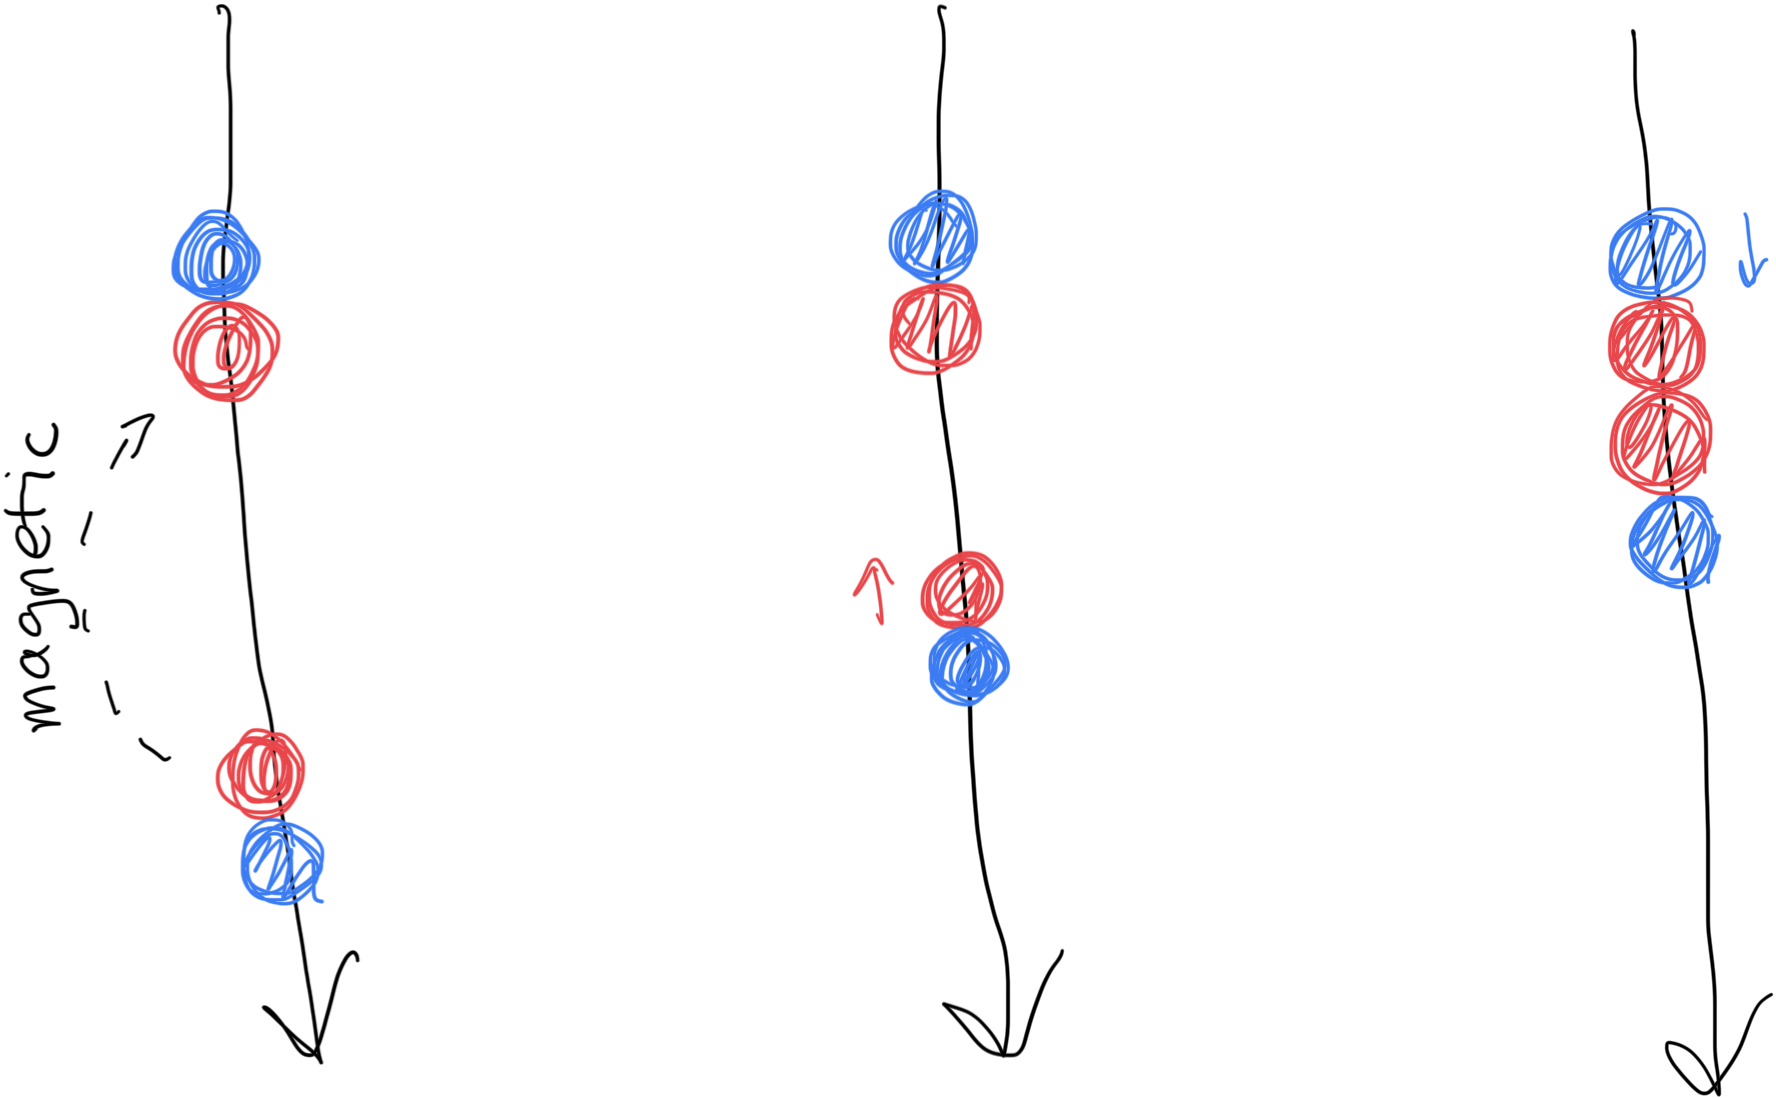
- When there’s a gap between balls of the same color, they try to connect
- The front section of matching balls is pulled backward magnetically
- This creates opportunities for:
- Setting up future matches
- Creating chain reactions
- Strategic placement of balls to trigger magnetic pulls
- Questioning your understanding of actual magnets
Special Balls and Power-ups
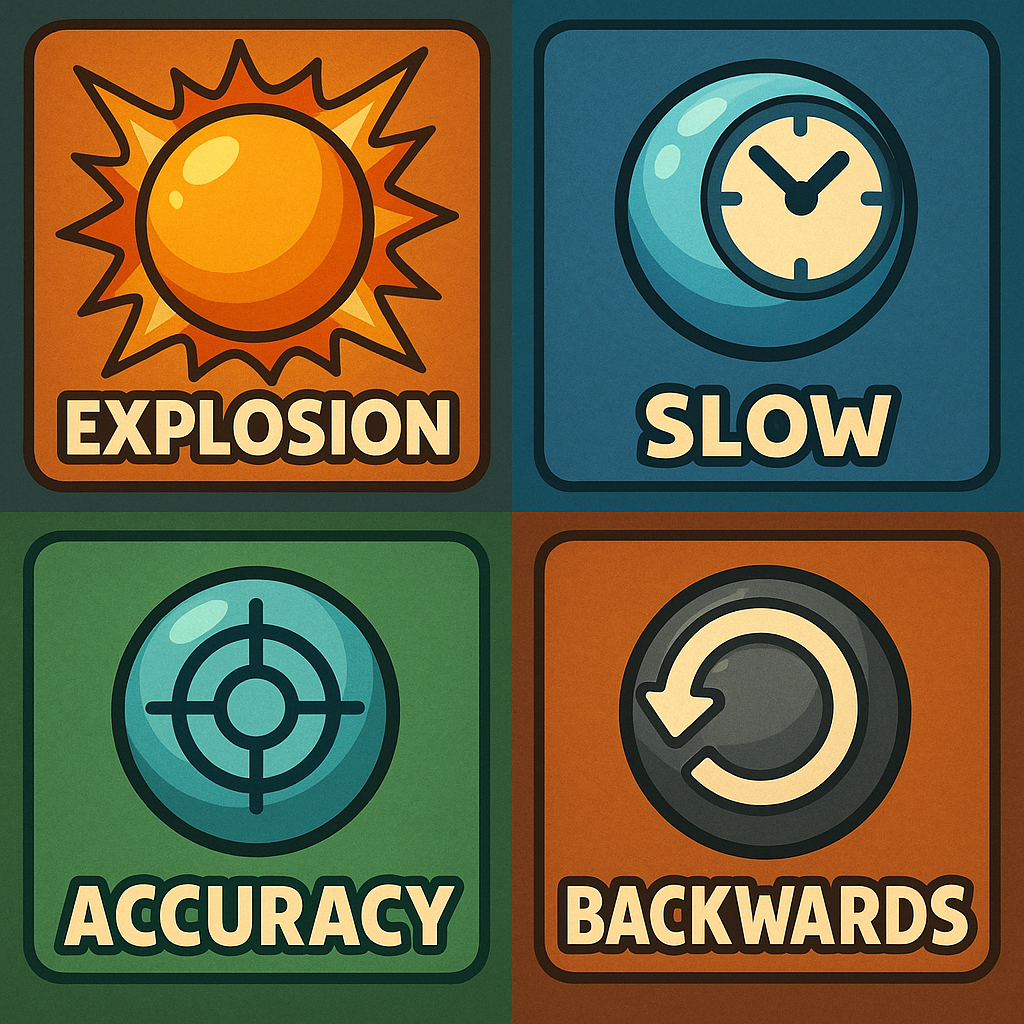
The game features special balls that trigger powerful effects when matched:
-
💣 Explosion
- Creates an expanding blast radius
- Removes any balls caught in the explosion
- Useful for clearing large sections of the chain
-
⏸️ Slow Effect
- Temporarily reduces the chain’s movement speed
- Gives you more time to make matches
- Effect lasts for a limited duration
-
🎯 Accuracy Effect
- Shows a targeting line to help with aiming
- Reduces the firing delay
- Perfect for precise shots
- Effect lasts for a limited duration
- For when you’re tired of blaming the physics engine
-
🔃 Backwards Effect
- Reverses the chain’s movement direction
- Can help prevent balls from reaching the end
- Effect lasts for a limited duration
- Because sometimes you need a cosmic “undo” button
Special balls appear randomly in the chain, with Slow and Accuracy effects being more common than Explosion and Backwards effects. The game prevents power-ups from spawning next to each other to maintain balance.
Sound System
The game uses procedurally generated sound effects powered by SFXR, creating distinct audio feedback for different game events:
- 🎯 Launching a ball
- 💥 Ball collisions
- ✨ Matching and clearing balls
- 💫 Special effect activations
- 🏁 Game over events
Each sound is synthesized with specific waveforms and parameters to create unique, arcade-style audio that matches the action. The sound system is event-driven, triggering audio in response to game events rather than being tied directly to the game mechanics.
Game Over Conditions
Like all good things (and some questionable coding sessions), every game must come to an end. There are two ways this can go down:
Sweet Victory 🏆
- Clear every last ball from the track
- Feel that rush of dopamine as chain reactions cascade
- Briefly consider adding “Professional Ball Matcher” to your resume
Crushing Defeat 💀
- Watch in horror as the balls reach their destination
- Experience all five stages of grief in about 2 seconds
- That moment when you realize your carefully planned color match was just one ball too late
- Console yourself with “at least it wasn’t a real ancient temple”
The best part? Whether you win or lose, that “just one more try” feeling kicks in almost immediately. It’s like the game knows exactly how to push your “okay, THIS time I’ll get it right” buttons. And before you know it, you’re back at it, determined to show those colored balls who’s boss.
Pro tip: If you find yourself losing repeatedly on a particular level, try focusing on creating chain reactions rather than matching every possible trio. Sometimes the path to victory involves letting the chain grow a bit longer so you can set up more spectacular combos. Just don’t let your ambitions for an epic match cloud your judgment of how close those balls are getting to the end!
Game Implementation
Under the Hood: How It All Works
So, I decided to build my own version of Zuma in TypeScript. Why? Partly for nostalgia, partly to learn, and partly because I enjoy solving interesting physics problems. Let me walk you through how it all works.
Core Components
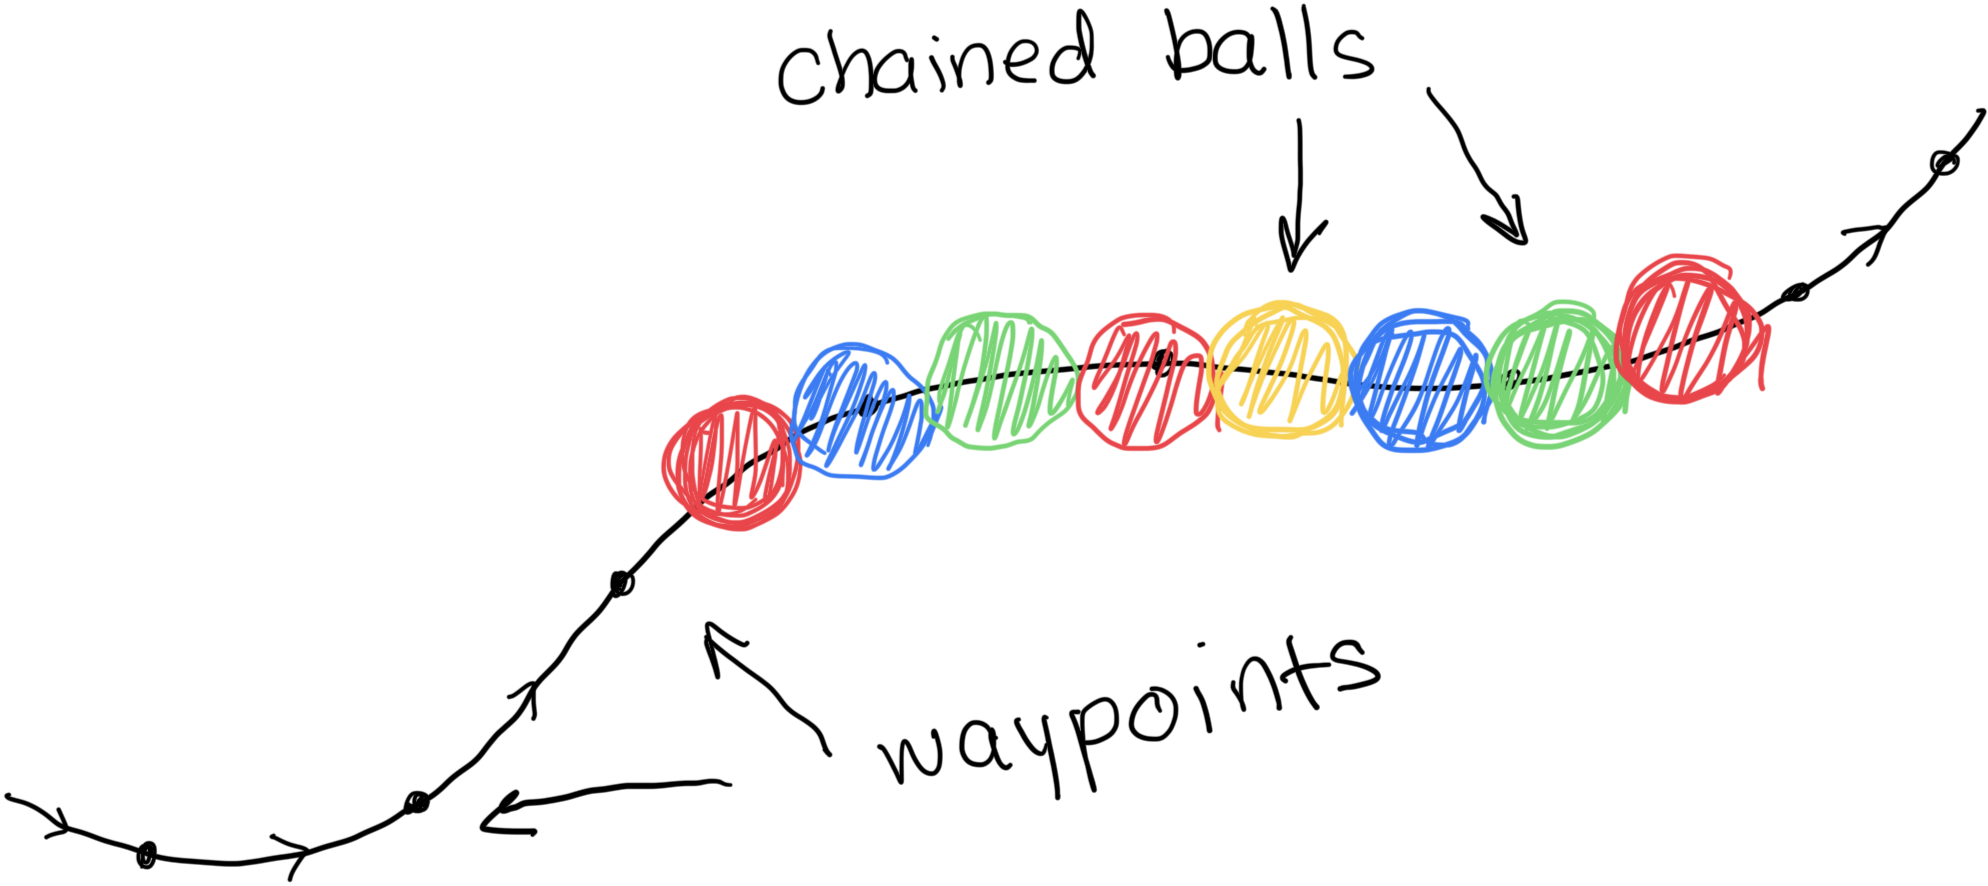
At its heart, the game is a dance between two main elements: the path (our dance floor) and the balls (our dancers). The path guides the movement, and the balls follow along - though keeping them moving smoothly turned out to be quite the challenge.
Board Generation: Where the Magic Happens
Rather than creating new board layouts from scratch, I decided to recreate the original Zuma levels. This was both a tribute to the original game and a fascinating exercise in reverse engineering. Each board is a recreation that aims to capture the feel of the original levels, including:
- The paths that made each level memorable
- The strategic launcher positions that defined the challenge
Board Recreation Process
To recreate the original Zuma boards, I built a special map editor mode into the game. When enabled, it allows me to:
- Load a reference image of the original board as a background
- Click points on the screen to trace the exact path
- Capture the coordinates
- Use these points to generate the smooth paths for the recreation
This tool made it possible to reproduce the original levels while ensuring the paths felt natural and playable.
Path Generation
While the boards themselves are recreations, I needed a way to make the paths smooth and natural. That’s where Chaikin’s smoothing algorithm comes in. It transforms the captured waypoints into smooth, curved paths that feel natural to play. Think of it as digital sandpaper for your jagged geometry:
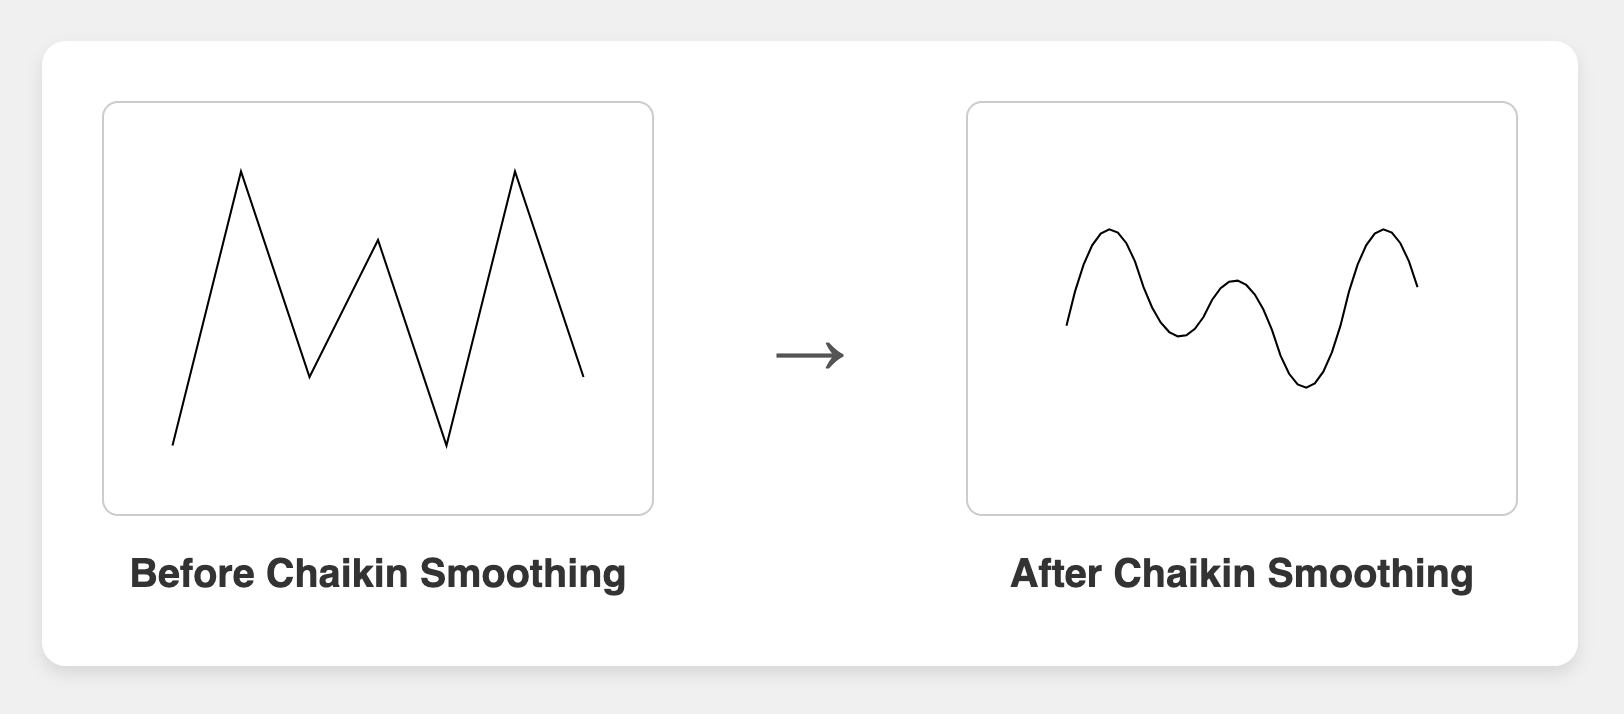
This allows designers to define tracks with just a few points while ensuring balls move smoothly along natural-looking curves. No more balls doing the electric slide when they should be waltzing!
Color Progression
The game implements color progression through three distinct levels:
- Basic colors: red, green, blue, and gold (aka “the training wheels”)
- Level 2: adds purple, because apparently four colors weren’t challenging enough
- Level 3: introduces silver, maximizing both the matching complexity and player frustration
Level Organization
Boards are organized in numbered sequences (1-1 through 9-7), with each sequence introducing new ways to make players question their life choices:
- Early boards (1-x): Simple paths and basic colors (aka “the confidence builders”)
- Mid-game boards (4-x to 6-x): More complex paths and additional colors (aka “the humility restorers”)
- Late-game boards (7-x to 9-x): Intricate paths with full color sets (aka “the reason I need a new keyboard”)
Some notable board types include:
- Mirror layouts where paths reflect across the screen
- Spiral patterns that wind inward
- Snake-like paths that weave back and forth
- Figure-eight patterns that create crossing points
Game State Management
Under the Hood: Managing the Game State
One of the most critical aspects of any game is how it manages its state. In Tsuma, the game state is a carefully orchestrated dance between multiple components, each playing a crucial role in keeping the game running smoothly.
Core State Structure
The game’s state is managed through a central Game object that contains everything needed to run the game:
-
🎮 Game Configuration
- Board boundaries and dimensions
- Ball speed and size settings
- Firing delay timers
- Audio settings
-
🔄 Active Game Elements
- The ball launcher position and color
- All active chains of balls
- Free-flying balls in motion
- Current effects (explosions, slow-motion, etc.)
- Paths that balls follow
-
📊 Game Progress
- Current board information
- Number of balls remaining
- Board completion steps
- Score and progress tracking
State Updates and Game Loop
The game uses a step-based update system where each frame:
- Updates all active effects (explosions, slow-motion, etc.)
- Processes ball movement along paths
- Handles collisions between free balls and chains
- Resolves any matches created
- Updates the launcher state
- Checks for win/lose conditions
This stepped approach makes the game deterministic and allows for interesting debugging features like state rewinding.
Debugging and Development Features
The game includes several developer-friendly features for debugging and testing:
-
📝 State History
- The game can maintain a history of previous states
- Useful for debugging and implementing undo functionality
- History is stored as serialized game states
- Configurable history limit to manage memory usage
-
⏸️ Debug Controls
- Step-by-step execution mode
- Collision detection visualization
- Path and waypoint rendering
- State export/import for bug reproduction
State Serialization
The game implements a robust serialization system that can:
- Export the entire game state to JSON
- Import previously saved states
- Handle complex circular references in the ball chain
- Preserve path and waypoint relationships
- Manage effect states and timers
This serialization system is particularly useful for:
- Implementing save/load functionality
- Debugging complex game states
- Creating reproducible test cases
- Supporting state rewinding for development
The serialization process carefully handles linked lists (used for ball chains) and maintains the integrity of ball-to-waypoint relationships, ensuring that when a state is restored, all game elements return to their exact previous positions and configurations.
Event System
The game uses an event-driven architecture to handle various game events:
- 💥 Explosions
- 🐌 Slow-motion effects
- 🎯 Accuracy power-ups
- ↩️ Backwards effects
- 🎵 Sound triggers
Each event can modify the game state in specific ways, and the event system helps keep these modifications organized and predictable. This makes it easier to add new features and debug existing ones, as each state change has a clear trigger and effect.
Conclusion
Building a Zuma Clone: What I Learned
Creating Tsuma has been an fascinating journey through game development, physics, and the art of making things “feel right.” Here’s what I learned along the way:
Technical Insights
-
🎯 Game Physics Isn’t Just Math
- While the math (like scalar projection for ball collisions) is important, what matters most is how the game feels to play
- Sometimes the “correct” physics solution isn’t the most fun one
- Small tweaks to things like ball speed and magnetic effects can dramatically impact gameplay feel
-
🏗️ Architecture Matters
- A clean separation between game state, rendering, and input handling made development much smoother
- The event system proved invaluable for debugging and adding new features
- Investing in good debugging tools early saved countless hours later
-
🔄 State Management is Critical
- Games are essentially complex state machines
- Having a robust state management system (with features like history and rewinding) made debugging much easier
- Serialization is trickier than it looks, especially with circular references and linked structures
Game Design Lessons
-
🎮 Simple Rules, Complex Gameplay
- Zuma’s basic mechanics (shoot balls, match colors) are simple to understand
- The depth comes from emergent gameplay: chain reactions, strategic planning, risk management
- Power-ups add variety without overwhelming the core mechanics
-
🎨 Polish Matters
- Small details like ball magnetism and chain reactions make the game feel more satisfying
- Sound effects and visual feedback help players understand what’s happening
- Debug visualizations can be beautiful too!
Final Thoughts
Building a game clone might seem like “just” copying something that exists, but it’s actually a fantastic way to learn. You start with a known target (so you can focus on implementation rather than design), but you still face all the interesting technical challenges of building a real game.
Whether you’re a seasoned developer or just starting out, I encourage you to try building your own clone of a game you love. You might be surprised at how much you learn about:
- Game development patterns and practices
- Physics and mathematics in real applications
- The importance of “game feel” and polish
- The joy of making something that’s actually fun to play